
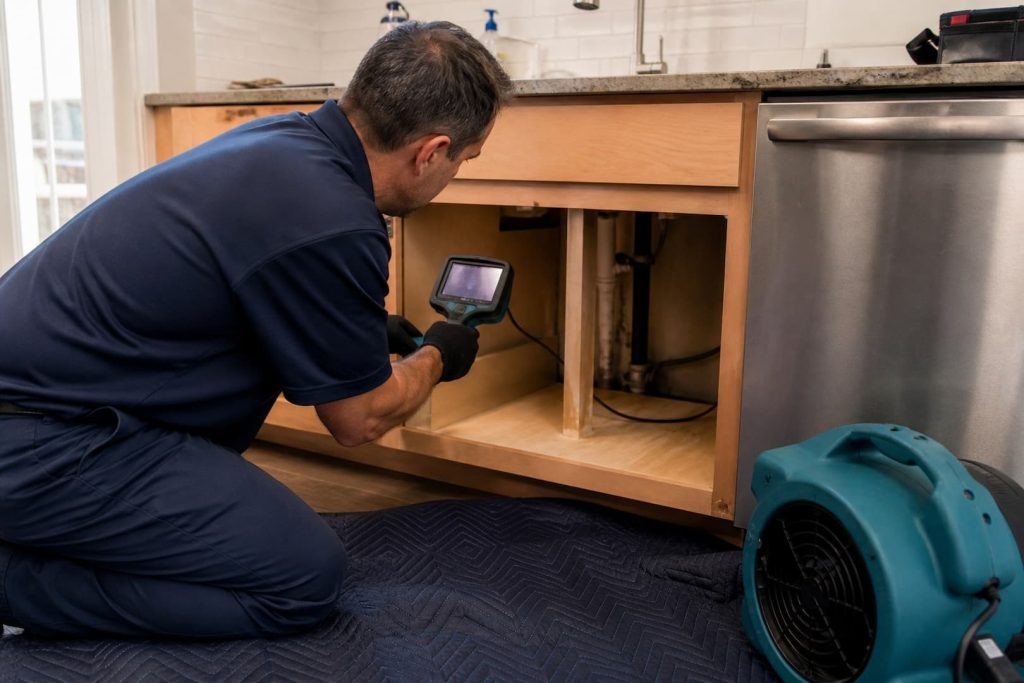
Dishwasher leaks are easy to underestimate because the appliance and cabinet toe-kick hide the first hours of water movement. By the time a puddle appears, water may have reached the cabinet base, flooring underlayment, subfloor, adjacent wall and ceiling below. The visible front edge is not the drying boundary.
Stop the cycle. If the plug, outlet, junction box or floor around the electrical connection is wet, do not pull the dishwasher out or touch the power connection. Close the appliance water valve only when it is identified and safely accessible; otherwise call a plumber or use the known building shutoff.
Match the pattern to the source
| When water appears | Possible source | Useful evidence |
|---|---|---|
| Even when dishwasher is off | Supply line, shutoff or inlet connection | Pressurized flow, wet valve cabinet, continuous meter movement |
| During filling | Inlet valve, supply fitting or overfill condition | Leak early in cycle, clean supply-side water |
| During washing | Door gasket, spray-arm issue, tub or excessive suds | Front-edge splash or internal circulation leak |
| During draining | Drain hose, clamp, sink/disposal connection or blocked drain | Dirty wash water, sink interaction, leak late in cycle |
| After countertop or sink use | Sink plumbing or countertop seam | Water path may only pass beside dishwasher |
| Only after rain | Exterior or roof source using cabinet void | Inspect envelope before appliance replacement |
Do not repeatedly run cycles to locate the leak. An appliance technician can inspect connections and components with appropriate access. A plumber may be needed for the shutoff, supply, drain, disposal or sink plumbing. Restoration addresses the water already in the building.
First-response sequence
- Stop the cycle and keep the area clear. Watch for wet outlets and a sagging ceiling below.
- Isolate water from a dry position. Do not reach through a flooded sink cabinet.
- Photograph before moving the appliance. Capture the water line, toe-kick, adjacent cabinets, flooring and lower level.
- Call the source trade. Preserve failed hoses, clamps or valves when practical.
- Extract accessible water. Towels at the front do not remove water beneath cabinets.
- Inspect connected layers. Follow seams, penetrations, cabinet runs and floor slope.
- Dry before reinstalling finishes. The subfloor and cabinet components need their own endpoints.
Supply water versus wash water
A supply-line failure may begin with potable water. A drain-hose or tub leak contains detergent, food soil and whatever was on the dishes. Water quality can deteriorate further in a dirty cabinet void or during prolonged warm exposure. Tell the restoration team which stage of the cycle was active and whether the sink or disposal backed up.
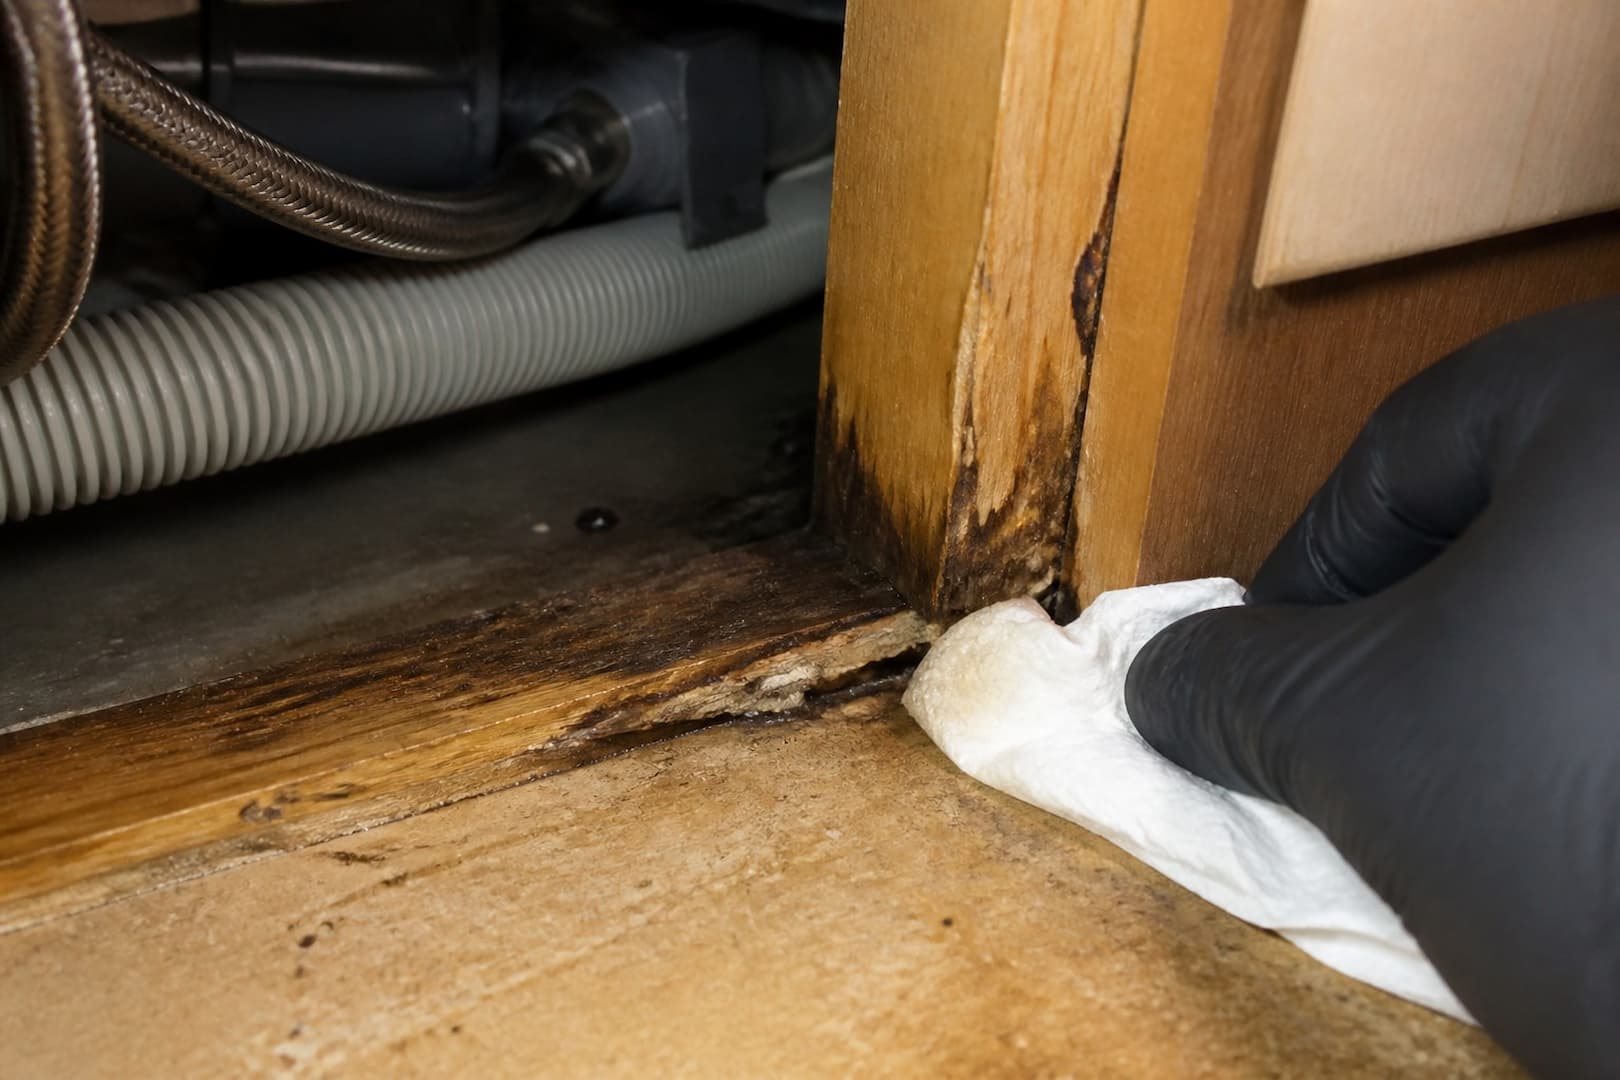
Do not assume detergent sanitized the loss. Cleaning and salvage decisions follow the source, path, time and material. If sewage moved backward through the drain, treat the event as a contaminated backup rather than an ordinary appliance leak.
Cabinet decisions
Solid wood components often tolerate controlled drying better than particleboard or medium-density fiberboard. Swollen toe-kicks, delaminated veneer, crumbling cabinet bases and trapped food residue are poor signs. A stone countertop may span several units, so cabinet removal requires support planning rather than force.
Selective toe-kick removal can provide inspection and airflow while preserving usable cabinet boxes. The decision depends on construction and access. Drilling random holes can damage utilities, spread contamination and still miss the wet layer.
Flooring beneath the dishwasher
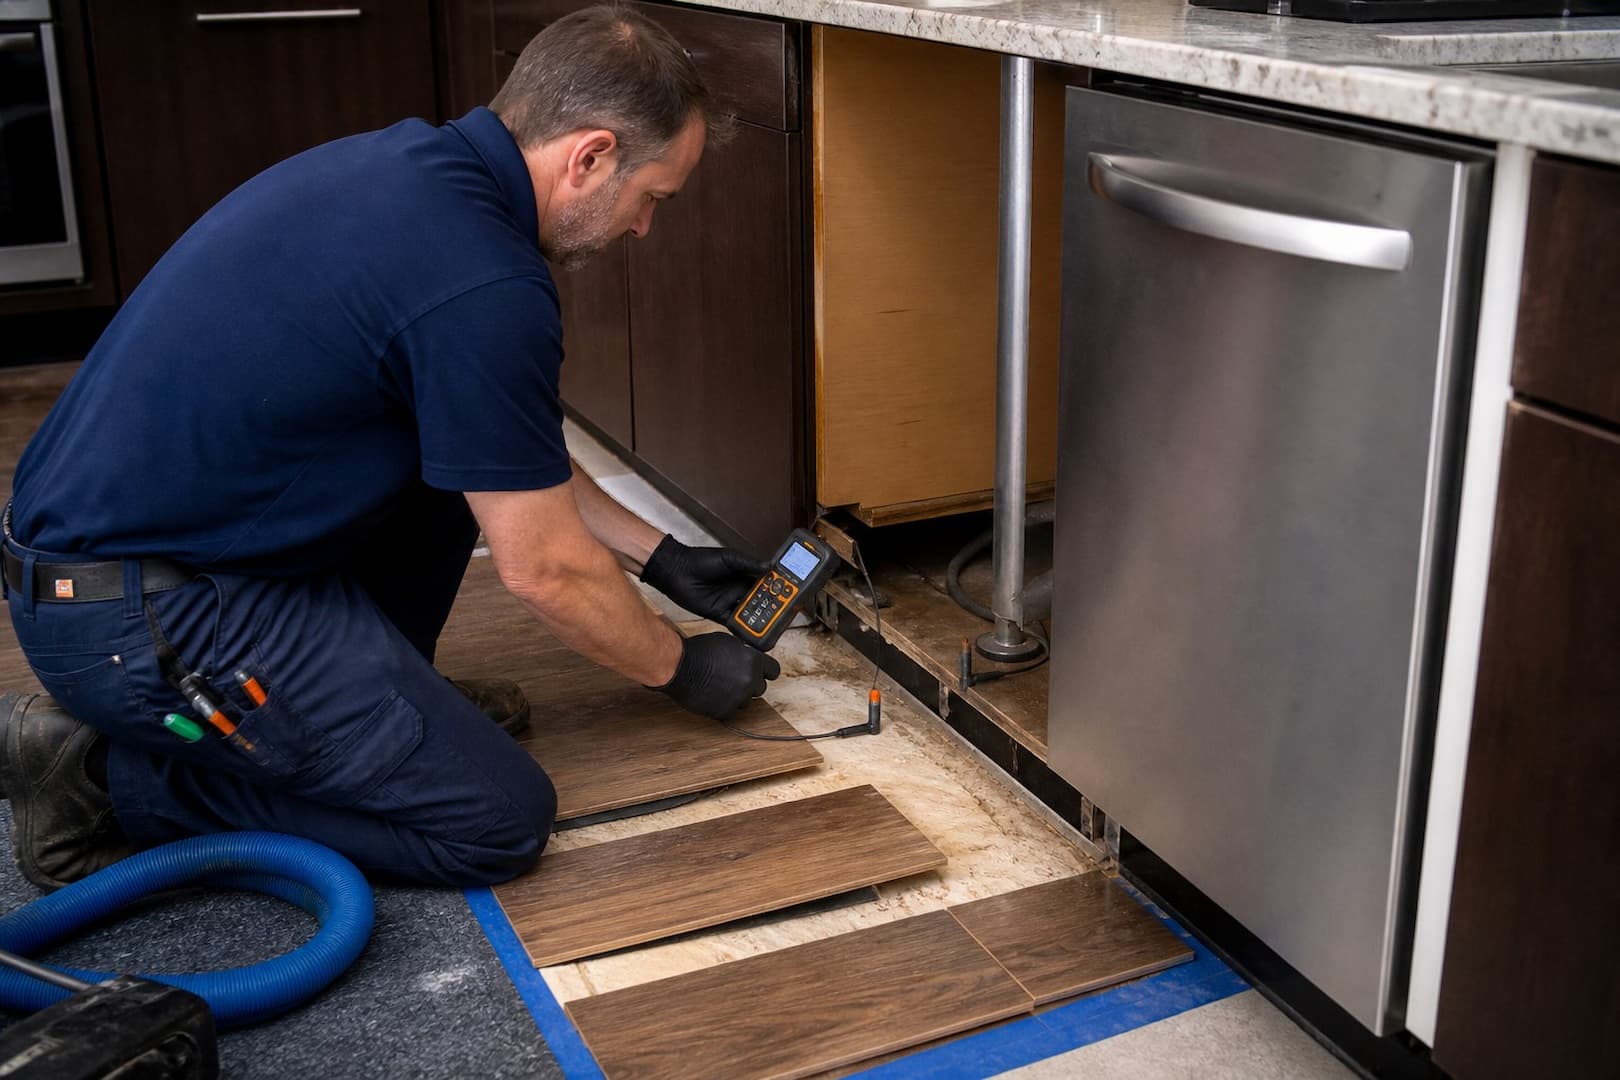
Many kitchens have finished flooring in front of the dishwasher but not under it, creating an edge that traps water. Floating floors can carry water across a broad area; sheet goods can seal it against underlayment; tile can hide wet backer board or subfloor. Hardwood may cup days after the puddle is gone.
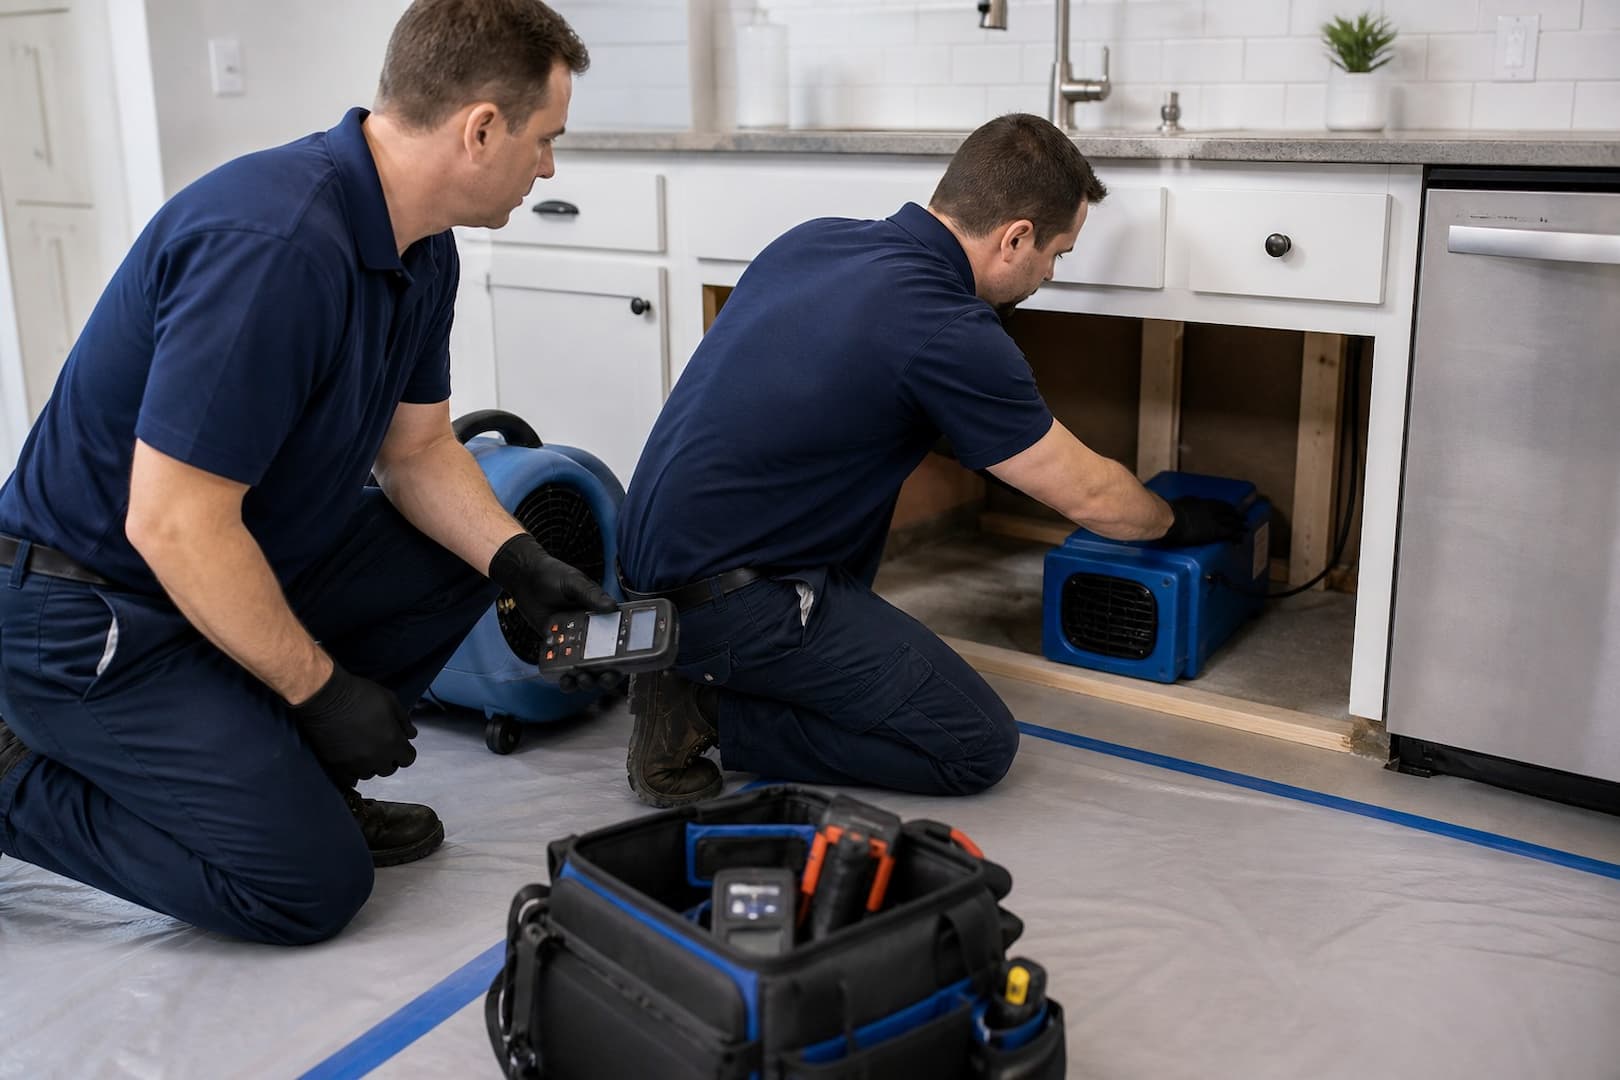
Water-damage restoration may use extraction at seams, controlled edge access, floor drying systems, dehumidification and moisture monitoring. Whether flooring stays is a material decision, not a promise based on the visible surface.
Drying the wall and lower level
Water can enter the wall through plumbing penetrations and wick into drywall behind cabinets. On an upper floor it may follow a joist bay and emerge at a light fixture far from the dishwasher. Keep people away from bulging ceilings and let an electrician address wet devices.
Reconstruction begins after remaining cabinet, subfloor, framing and wall materials are clean, sound and dry to the agreed standard. Covering the toe-kick because the odor improved can trap a continuing problem.
Claim documentation
Photograph the source before repair when safe, record the cycle stage, preserve the failed part, and save appliance-service and drying records. Distinguish appliance repair from resulting building damage in the inventory. Policy treatment of slow leakage, wear, sudden discharge and mold varies; ask the insurer for the applicable coverage decision in writing.
Preventing dishwasher leaks
- Inspect the supply valve, braided connector and drain hose for seepage, corrosion and abrasion.
- Secure and route the drain hose according to appliance and plumbing requirements.
- Maintain the sink drain and disposal connection; remove the disposal knockout when required during installation.
- Use the specified detergent and avoid excess suds.
- Do not force the appliance against hoses or wiring when reinstalling it.
- Install a shallow appliance pan or floor-level leak sensor where compatible.
- Check below the sink and at the toe-kick during cycles instead of waiting for visible floor damage.
Dishwasher-leak questions
Should the appliance be pulled out immediately?
Only after water and electricity are safely isolated and the countertop, floor and connections are understood. Pulling can tear a live hose or damage finished flooring.
Can cabinets dry without removal?
Sometimes, especially with selective toe-kick access and sound materials. Swollen composite wood, contamination and inaccessible wet layers make removal more likely.
Why is the wood floor cupping after the leak stopped?
The underside may remain wetter than the face. Uneven moisture changes board dimensions; premature sanding can create a later crowned profile as the floor equalizes.
A dishwasher has four common water paths
Supply leaks can occur while the appliance is idle because the line may remain pressurized. Drain and pump leaks appear during specific cycle stages. Door-seal or oversudsing problems release water at the front. A failed tub, hose, or connection beneath the unit can spread water behind the toe-kick with little visible puddling. Run-cycle observation belongs to a qualified appliance or plumbing professional when electrical and leak conditions are controlled.
| When water appears | Likely path | Evidence to preserve |
|---|---|---|
| Even when machine is off | Supply valve, line, or fitting | Valve/line photos and failed component |
| During fill | Inlet valve, connection, overfill | Cycle timing and error code |
| During wash | Door seal, spray, tub, oversudsing | Detergent/product history and front pattern |
| During drain | Pump, drain hose, sink/disposal connection | Leak location and drain condition |
| Only after many cycles | Small intermittent leak or condensation | Cabinet/floor moisture trend |
Cabinets can look intact while their cores swell
Face frames and doors may be solid wood while box sides, backs, and toe-kicks are particleboard or MDF. Water wicks into exposed lower edges and fastener holes. Once a composite core swells or delaminates, surface drying does not restore its dimensions or strength. Plywood cabinets may be more salvageable if layers remain bonded and all wet surfaces can be reached.
Remove the toe-kick or a controlled cabinet panel when evidence shows water behind it. Do not pry finished parts without a reconstruction plan. Photograph joints, swelling, staining, and readings. Stone countertops can bridge several boxes; removing one wet cabinet may require temporary support and a cabinet specialist.
Flooring may continue under the cabinet and appliance
Floating laminate or engineered flooring can trap water across a wide area because seams and underlayment distribute it. Tile may look unaffected while water reaches the mortar bed, underlayment, or wood subfloor at penetrations. Sheet vinyl can slow evaporation. Hardwood needs readings in boards and subfloor before anyone sands or replaces it.
The guide to hardwood floor water damage explains cupping and delamination decisions. For water under the cabinet wall, hidden wall damage covers selective access.
Remove the appliance safely
Shut water and power through the proper controls. Dishwashers may be hardwired, connected to an outlet in another cabinet, secured to the countertop, and tied into a disposal or air-gap assembly. A plumber, appliance technician, or electrician should disconnect it when the setup or damage is uncertain. Protect flooring while moving the appliance and avoid dragging a leaking hose through the room.
- Photograph supply, drain, power, and mounting before disconnection
- Retain the failed line or part when safe and relevant to a claim
- Inspect the wall, cabinet bases, flooring edge, and level below
- Extract free water before setting drying equipment
- Create access to wet layers rather than blowing only at the toe-kick
- Verify readings against dry kitchen references
Prevention starts at installation details
Use listed components and follow manufacturer requirements for the supply line, drain high loop or air gap, electrical connection, leveling, and fastening. Inspect the accessible line and valve periodically. A drain hose routed incorrectly can allow backflow; an appliance forced against a hose can abrade it. A leak pan or sensor may reduce discovery time, but it must not conceal small leaks or block service.
Kitchen water-damage restoration is warranted when water passes under fixed cabinetry, flooring, walls, or the ceiling below. The appliance repair and the building drying should be documented as connected but separate scopes.
Start with a no-power, no-cycle evidence check
Do not run another wash cycle to “find the leak” while water remains near electrical connections or hidden building materials are already wet. Record whether water appeared while the appliance was idle, during fill, wash, or drain; photograph the display or error code; note recent installation or service; and preserve detergent type and load conditions. That information helps the appliance technician reproduce the failure after the area is made safe.
Inspect only from dry, accessible locations. A supply connection may remain pressurized when the dishwasher is off. Drain leakage may appear at the sink cabinet, disposal, air gap, high loop, pump, or hose. Door leakage can come from a gasket, level condition, spray obstruction, oversudsing, loading, or damaged tub. The appliance diagnosis and the building moisture map should inform each other without one trade claiming the other’s scope.

Map five zones even when only one cabinet looks wet
- Appliance bay: floor, wall, supply and drain penetrations, power connection, insulation blanket, and toe-kick.
- Sink cabinet: valve, disposal or tailpiece, drain hose, cabinet floor, and wall penetrations.
- Adjacent cabinet run: bottom edges, face frames, toe-kick void, countertop supports, and end panels.
- Floor system: finished floor, seams, underlayment, subfloor, transitions, and heating components if present.
- Lower or neighboring area: ceiling, wall top, light fixtures, basement or crawl space, and adjoining room.
A meter reading must be tied to a material and dry comparison. Metal cabinet hardware, tile, wires, and layered flooring can distort some instruments. Use readings to build a pattern, then create access where the result changes salvage or drying.
Choose cabinet access without sacrificing the whole kitchen
Toe-kicks may be removable trim, integrated into cabinet boxes, or covered by finished skins. Cabinet floors may have voids below them. A controlled opening inside a sink base, adjacent cabinet, unfinished end, basement ceiling, or toe-kick can expose the reservoir while preserving visible finishes. Stone counters spanning multiple cabinets may need temporary support before any box is removed.
Solid wood may recover after controlled drying if joints remain stable. Plywood can be retained when plies stay bonded and surfaces are accessible. Particleboard and MDF commonly swell at raw edges and fastener holes; once the core expands or loses strength, a dry surface does not reverse the damage. Document this by component instead of declaring every cabinet saved or lost.
Match drying to the assembly
| Assembly | Drying challenge | Possible access or decision |
|---|---|---|
| Tile over wood | Water enters at edges but surface slows evaporation | Inspect grout, transitions, underlayment, and subfloor from above or below |
| Floating laminate | Underlayment spreads and traps water | Lift affected planks when compatible with product and contamination |
| Hardwood | Boards and subfloor dry at different rates | Trend both layers; use specialty floor drying when appropriate |
| Sheet vinyl | Low-permeance finish limits upward drying | Access underside or remove where required |
| Cabinet toe-kick void | Air does not reach behind fixed skin | Controlled panel access and directed drying |
| Insulated ceiling below | Wet insulation holds reservoir | Selective ceiling access and insulation decision |
Fans aimed at a closed toe-kick may make the room air dry while the void remains wet. Extraction, dehumidification, pressure or mat systems, and selective access should be chosen from the reservoir and water category. Verify the same marked locations until the trend meets the written dry target.
Use a four-part salvage decision
- Source: sanitary supply, wash water, drain water, or mixed contact path
- Material: solid wood, plywood, composite core, floor product, underlayment, gypsum, or insulation
- Condition: swelling, delamination, loss of fastener hold, staining, odor, microbial growth, or unchanged integrity
- Access: whether all relevant surfaces can be cleaned, dried, measured, and inspected
Time is relevant but not an automatic verdict. A slow leak can create more material damage with little standing water. A large recent supply release can be visually dramatic yet more recoverable if controlled promptly. Avoid fixed promises such as “everything is safe under 24 hours” or “all cabinets must go after 48.”
Close the claim and reconstruction loop
Photograph the appliance, installation, failed component, water path, cabinet material, flooring layers, ceiling below, and readings. Retain the failed hose, valve, clamp, pump, or fitting when the insurer or responsible party may need it and it can be stored safely. Ask the technician to state what failed and what was tested after repair without making coverage conclusions.
Before reinstalling the dishwasher, confirm the building assembly is released, utilities are safe, the cabinet opening is dimensionally sound, floor protection does not block leveling, and the drain and supply follow manufacturer requirements. Then test through a complete cycle under observation and recheck the previously wet zones.
Protect countertops and cabinet geometry during access
Removing a cabinet panel or toe kick is not the same as dismantling the entire run. Stone countertops, sink bases, integrated panels, floor transitions, and shims can depend on surrounding cabinet support. Before removal, photograph reveals and alignment, identify fasteners and utilities, and decide who will support heavy tops. Selective access should expose the wet layer without turning a localized appliance loss into avoidable cabinet or countertop damage.
Sources and further reading
- CDC: Guidelines for Cleaning Safely After a Disaster
- Boston.gov: Recovering from a Flood
- Massachusetts DPH and MassDEP: Flooding and Sewage Back-ups Home Care Guide
- Massachusetts DPH: Quick Reference — Water Damage Response in Buildings
When the toe-kick conceals the damage
Boston Restoration Group can map moisture beneath cabinets and flooring, extract water, create controlled access and monitor drying after a plumber or appliance technician stops the leak.