
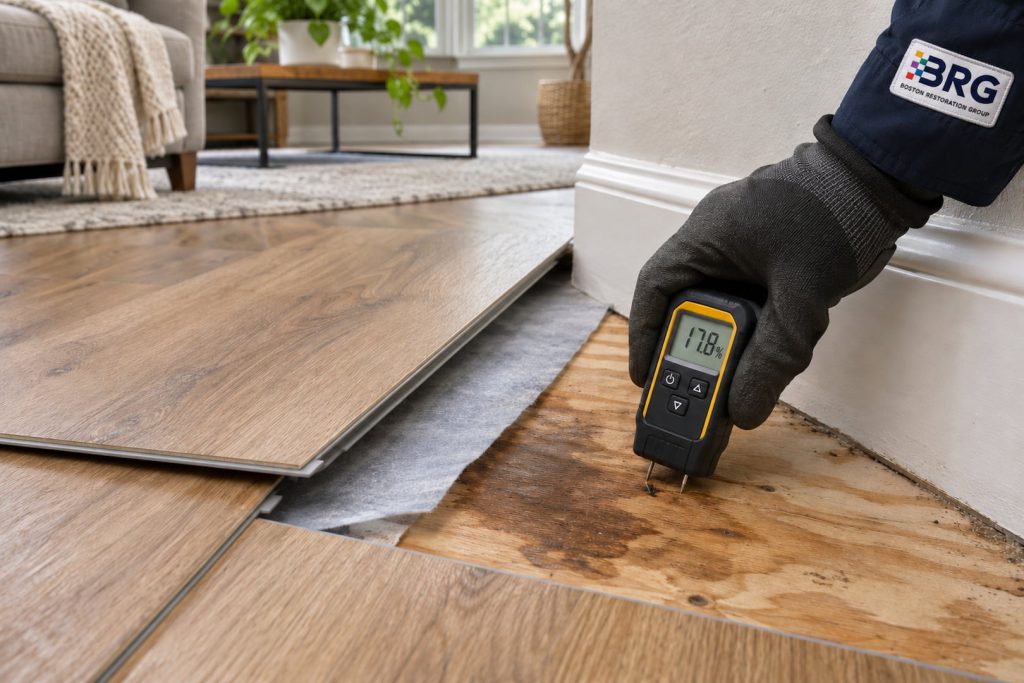
Water under vinyl plank flooring needs attention even when the planks look normal. A waterproof surface does not keep every seam, perimeter gap, underlayment, adhesive, or subfloor dry. Stop the water source, address electrical hazards, and have the affected layers checked before deciding that a fan or a dehumidifier has solved the problem.
Some floors can be lifted, cleaned, dried, and reinstalled after suitable water exposure. Others need partial or complete replacement. The answer depends on the source, how far water traveled, the condition of the locking joints, and whether every affected layer can be reached and made suitable for reuse.
Why waterproof flooring can still have water damage underneath
The waterproof claim usually describes a product under the conditions specified by its manufacturer. It does not turn an ordinary floating floor into a watertight basin. Water can enter at wall edges, door transitions, penetrations, damaged joints, or locations where appliances or plumbing leaked below the surface.
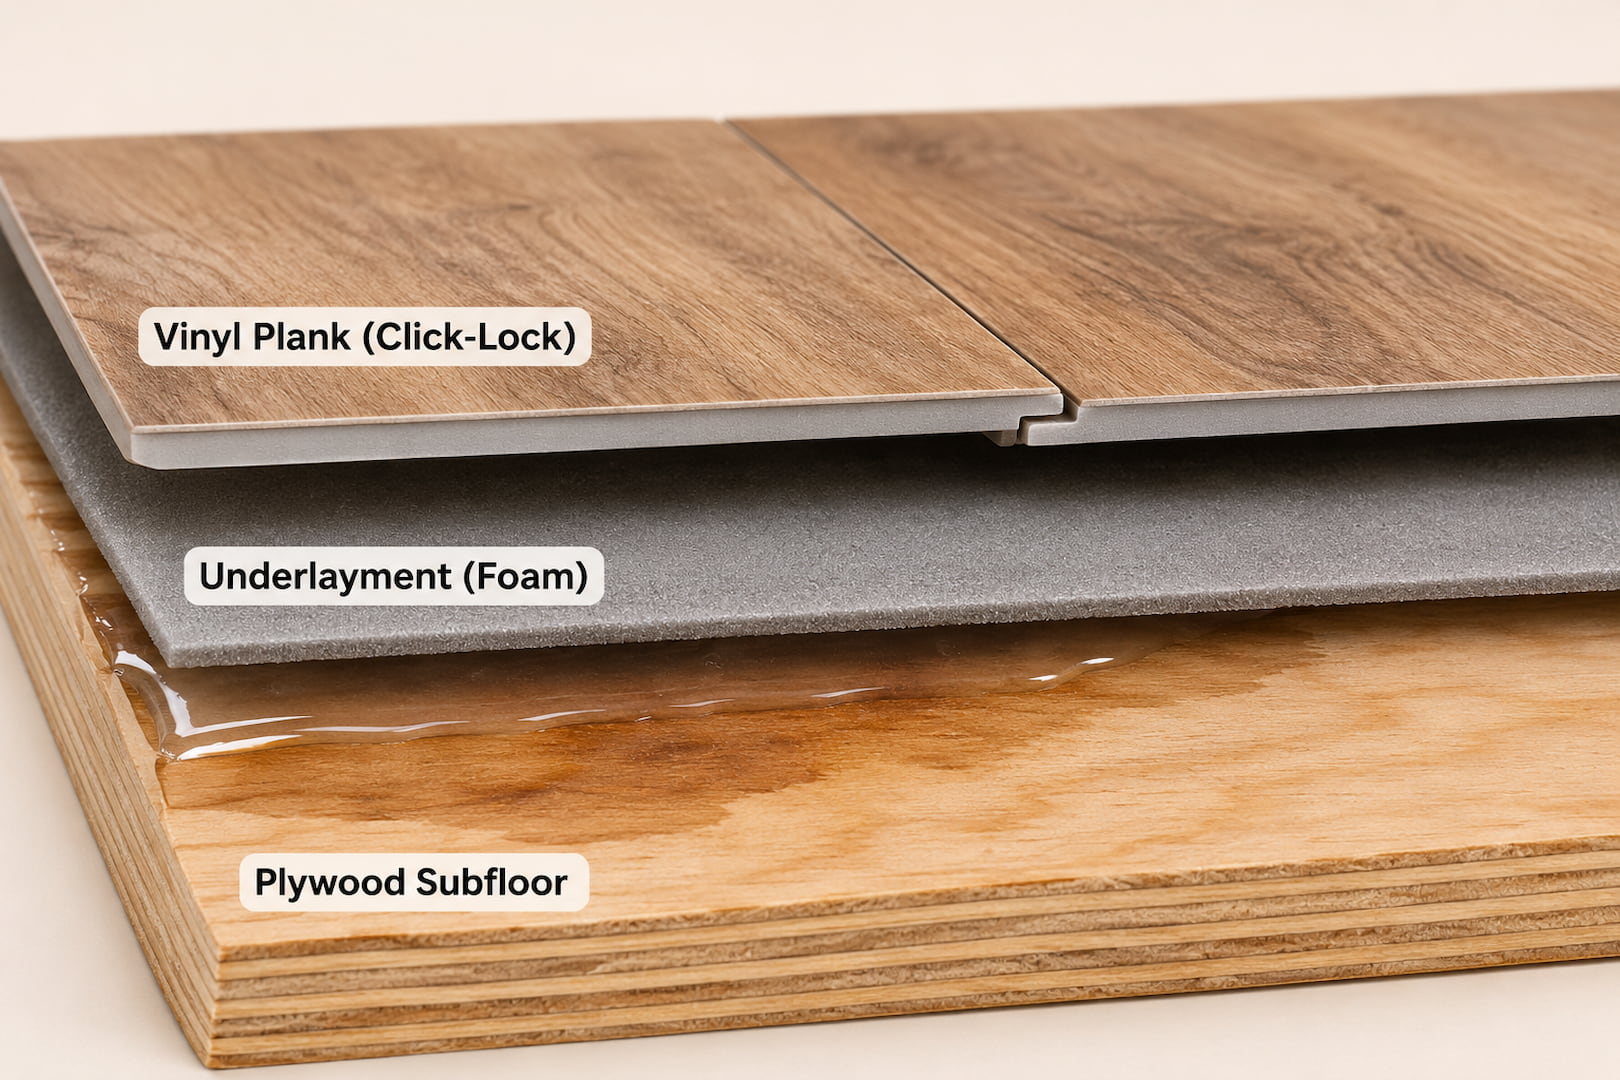
Confirm that the product is luxury vinyl plank, often abbreviated LVP, rather than a similar-looking laminate. Then identify whether it has a rigid or flexible core, an attached pad, or separate underlayment. A wood-look pattern tells you none of that. The carton label and installation instructions give the restoration team and installer a much better starting point.
A manufacturer’s own instructions show the distinction. Mohawk’s rigid-plank installation guide describes that product as waterproof while warning that it must not serve as a moisture seal for an existing floor. It also requires suitable site conditions. Use the instructions for your exact product; this example is not a warranty statement about every vinyl floor.
The plank may retain its shape while water sits against plywood, an absorbent attached backing, debris, or an older floor covering. A plastic wear surface that still looks good says little about those hidden materials. That is why salvage decisions should describe the layers individually rather than label the entire floor waterproof or ruined.
First, work out which water reached the floor
A recent supply-line spill, an appliance discharge, a toilet overflow, and outdoor floodwater do not present the same cleanup problem. Appearance is not enough: clear water can contain contamination, and water that began from a relatively sanitary source can encounter soil or affected materials as it travels.
Tell the restoration team where the water came from, when it was discovered, whether it is still entering, and what it contacted. If sewage or outdoor floodwater is involved, keep people out of the affected area and leave cleanup to a team equipped for that exposure. Do not start ordinary fans that could spread contaminants.
- Stop the source only from a safe, accessible location; involve the plumber, appliance technician, or building manager as needed.
- Avoid wet electrical equipment, plugs, and cords. If water is near them, get electrical safety addressed before attempting extraction.
- Photograph the visible water, floor edges, adjacent rooms, and any displaced or damaged planks.
- Locate the flooring brand, product name, spare carton, and installation record if available.
- Arrange assessment of both the finish and the layers below it; report any wet ceiling or occupied room underneath.
For water spread across a room, water extraction removes accessible liquid before the drying plan begins. Removing the puddle from the face of the vinyl does not confirm that water beneath it has been recovered.
Signs that water may be trapped below the planks
Water squeezing from a seam, a new musty odor, damp trim, or moisture at an adjacent carpet edge deserves investigation. A floor may develop lifting, movement, or an unusual sound underfoot. None of these signs alone identifies the source or establishes how much of the assembly is affected.
Some wet floors show almost no change at first. Water can travel below a continuous floating installation into a neighboring room without leaving a visible surface trail. A dry-looking center of the room is therefore a poor place to stop the assessment after a known leak at the perimeter.
Record observations rather than repeatedly stepping on the floor to force water out. If the surface moves noticeably, the subfloor feels weak, or a ceiling below is sagging, restrict access. A weakened assembly needs a qualified assessment before anyone treats it as ordinary floor maintenance.
Does the vinyl floor have to come up?
Not every spill requires removal. A small surface spill wiped up promptly, with no evidence that water reached an edge, seam, or lower layer, is different from a confirmed leak beneath the floor. Follow the product’s care instructions and watch for a recurrence. Once water is known to be underneath, leaving the planks down needs an explained way to inspect the affected layers and verify drying.
Lifting becomes more likely when water comes out of seams, the pad remains wet, odor or growth develops, or the team cannot reach the affected material to clean and dry it. The amount removed should follow the assessed wet area and the installation system. Taking up the visibly wet plank alone may miss connected wet sections; tearing out every room without checking the boundary can also be unnecessary.
Avoid drilling holes, heating the planks, or injecting cleaner through joints to create a shortcut. Those steps can damage the finish or locks while leaving the lower surface inaccessible. Ask the installer and restoration team to agree on access before removal begins, including how they will protect reusable pieces.
The installation method changes the salvage options
| Floor system | What needs checking | Why the answer varies |
|---|---|---|
| Floating click-lock planks | Locking edges, attached pad, perimeter access, water beneath connected rooms | Disassembly can damage joints; reusable planks still need a suitable dry base |
| Glue-down vinyl plank | Adhesive bond, substrate moisture, residue, plank distortion | A sound-looking face can cover failed adhesive or a wet substrate |
| Planks over wood subfloor | Plywood or OSB condition, seams, thickness changes, underside access | Drying does not reverse every form of swelling or delamination |
| Planks over concrete | Water source, slab moisture, underlayment, installation requirements | Concrete can hold moisture after visible liquid is gone |
| Planks over an older floor covering | Condition and identity of the underlying layers | Older tile, backing, or adhesive may require hazardous-material assessment before disturbance |
Floating floors
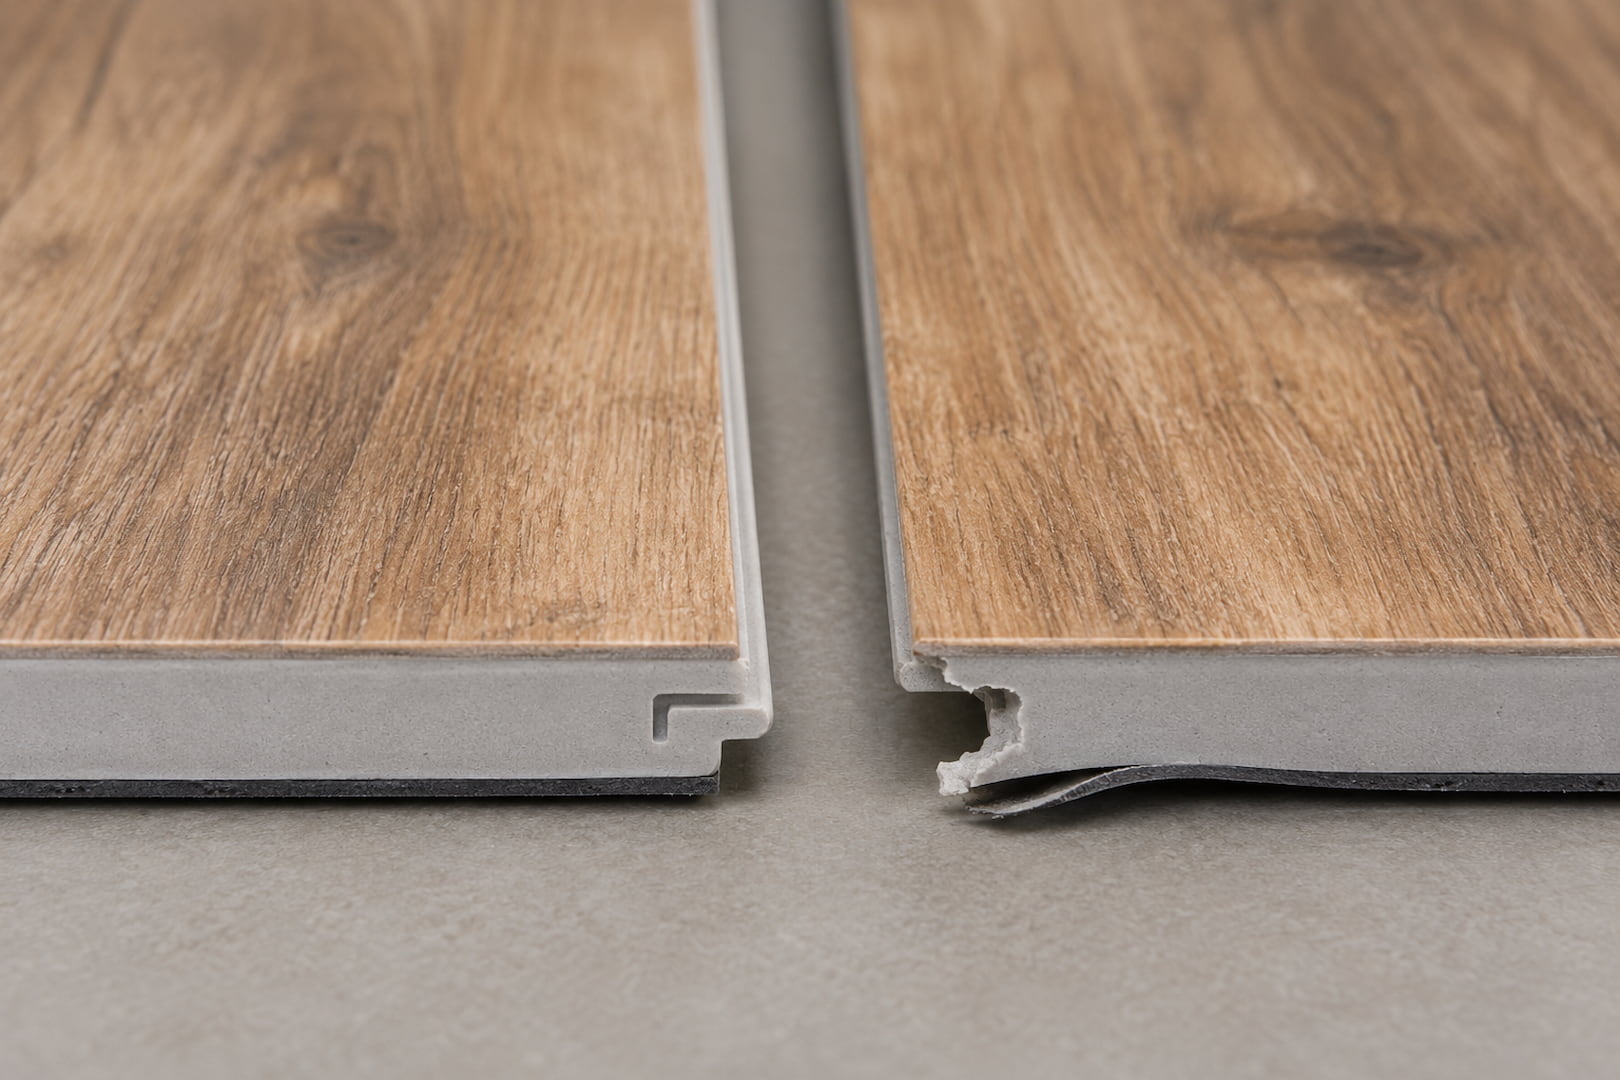
Access often means releasing the installation from an edge rather than pulling up one plank in the middle. An installer can judge whether the locking system allows disassembly and whether the edges remain usable afterward. Different products join differently, so a generic pry-up method can destroy a floor that might otherwise have been salvageable.
Ask how planks will be identified and stored if reuse is realistic. Pattern, orientation, trimmed end pieces, and existing damage matter when the floor goes back together. A broken tongue or locking edge cannot be made sound simply because the face is clean and dry.
Glue-down floors
A bonded installation raises a different question: is the bond still suitable, and can the substrate beneath it dry and support the floor? Softened adhesive, released edges, residue, or persistent moisture may rule out leaving the installation in place. The adhesive and flooring instructions should govern any repair method.
For example, Shaw’s direct-glue installation guidance calls for substrate testing and refers installers to the adhesive’s acceptable moisture limits. That is a reason to check the specific system, not to apply one moisture number to all glue-down floors.
Can a dehumidifier dry the water without lifting the floor?
A dehumidifier removes moisture from air that reaches it. It cannot establish whether a sealed or poorly accessible layer beneath vinyl is drying adequately. The room may feel comfortable while water remains under the floor. Access, materials, contamination, and measured progress determine whether drying in place is reasonable.
Do not accept a fixed number of equipment days as the only reason to keep the planks down. Ask how the team will evaluate the underside and subfloor. If that cannot be done with the floor in place, selective removal or broader lifting may be necessary to inspect, clean, and dry the assembly.
A useful water damage restoration plan explains which materials will remain, how workers will reach the wet layers, and how progress will be checked. If more water appears after drying begins, the source investigation may need to resume rather than simply extending the equipment rental.
How long will it take to dry? There is no reliable countdown based on the plank thickness or the number of days a dehumidifier runs. An exposed wood subfloor, damp foam trapped under a continuous installation, and a wet concrete slab release moisture differently. Ask for a progress check and the conditions needed for reinstallation. If the same concealed layer cannot be checked, more elapsed time alone does not resolve the uncertainty.
Wood subfloor and concrete need different checks
With plywood or OSB, examine the panel edges, layers, fastenings, and support as well as moisture. Some swelling may remain after drying; soft spots or separated layers may require repair. Where access below is available, the underside can provide information that the finished floor conceals.
Concrete requires a different interpretation. A handheld meter reading can help compare locations, but it should not be presented as a universal moisture percentage that approves installation. The flooring, adhesive, underlayment, and slab conditions determine which tests and limits are appropriate. The flooring installer should confirm those requirements before the restoration team closes the drying file.
A wet basement floor also raises the question of ongoing moisture from below or at the perimeter. Replacing planks after a one-time pipe leak is different from reinstalling over a slab that repeatedly receives water. Address the recurring source before covering it with a new finish.
A moisture barrier is an installation component, not a repair for an unresolved leak. Do not add a sheet over a still-wet slab or wood floor simply to separate it from new vinyl. First establish the moisture source and the product’s approved assembly; the installer can then determine whether a barrier belongs in that system.
What makes reuse less realistic?
Reuse becomes harder when contamination reaches inaccessible backing, the joints break, the planks distort, or the substrate no longer provides a sound base. It may also be impractical when the exact product is discontinued and replacement pieces will not lock into the existing installation. A close color match does not prove compatibility.
Request separate decisions for the planks, attached pad, loose underlayment, adhesive, and subfloor. The team should explain what can be cleaned, what can be dried, and what cannot reasonably remain. Salvaging the vinyl while replacing an unsuitable layer below it is different from declaring the whole assembly reusable.
Can mold grow under waterproof vinyl? Yes—the hidden assembly can include damp wood, dust, and other materials that support growth. CDC identifies wood, dust, and many common building materials as places mold can grow when moisture is present. The word waterproof on the plank does not answer whether those materials stayed wet.
If visible growth or persistent musty conditions appear, mold remediation may be needed before rebuilding. Spraying through a joint or covering the smell does not demonstrate that the underside was cleaned. Do not treat a household mold test as permission to reinstall over a wet surface.
Pause before disturbing older flooring underneath
Modern vinyl planks are sometimes installed over older tile or sheet flooring. That lower layer, its backing, or adhesive may require assessment before removal. EPA’s asbestos guidance warns that appearance cannot reliably identify asbestos and advises against untrained sampling or disturbance of suspect material.
Do not sand, scrape, drill, or grind an unfamiliar old layer to speed drying or prepare for new planks. Tell the restoration team what you know about the building and previous renovations. An access plan should account for that material before the crew reaches it.
Before the floor goes back down
EPA’s flood recovery guidance emphasizes drying building materials before refinishing or replacing floors. For vinyl, combine that principle with the exact installation requirements. Dry enough for a restoration handoff and approved for a particular adhesive or floor product are related questions, but they may require different evidence.
- Confirm the source has been repaired and there is no continuing water entry.
- Document cleaning or removal decisions for every affected layer.
- Check retained subfloor condition and record the relevant moisture results.
- Have the installer confirm substrate flatness, product compatibility, underlayment, and the manufacturer’s current requirements.
- Inspect reusable locking joints and allow for pieces damaged during removal.
- Keep photographs, product information, and the drying record with the repair paperwork.
Ask the manufacturer or seller about warranty questions using the exact product name and exposure details. For example, Mohawk’s January 2026 luxury-vinyl warranty distinguishes surface water exposure from water beneath the product and excludes subfloor and adhesive damage from its waterproof warranty. Other products have their own terms. A warranty decision, an insurance decision, and the physical question of whether a floor can be reused are separate matters.
Get the layers below the vinyl checked
Boston Restoration Group can assess water migration, extract accessible water, and plan drying or material removal for affected floors in Greater Boston. When you call, describe the water source, whether the floor is floating or glued down, and what lies beneath it if known. Those details help turn a surface-level concern into a clear repair plan.