Water damage isn’t just “water on the floor.” The type of water—how contaminated it is—changes everything: what’s safe to touch, what can be saved, what must be removed, how you disinfect, and how likely you are to end up with lingering odor, bacteria, or mold.
Professionals typically sort water damage into three contamination categories:
- Category 1: Clean Water — sanitary source, not expected to cause illness at the time of release.
- Category 2: Grey Water — contains contamination that can cause discomfort or illness.
- Category 3: Black Water — highly contaminated; may contain pathogens, sewage, or toxic residues.
If you take one rule from this article, take this:
If you can’t confidently identify the source, or the water touched sewage, soil, or outdoor floodwater, treat it as Category 3 until proven otherwise.
That single decision prevents a lot of “we cleaned it, but now it smells,” “everyone got sick,” and “the mold came back” situations.
Categories vs Classes (don’t mix these up)
People often hear “Category 2 water damage” and assume it means “moderate severity.” That’s not what “category” means.
Water Damage Category = contamination (how dirty and risky the water is)
- Clean / Grey / Black
Water Damage Class = size + behavior (how much water and how deeply it soaked in)
Class describes how water spread and how difficult it is to dry based on materials and saturation. A small amount of very contaminated water (Category 3) can still be a serious health risk, while a large amount of clean water (Category 1) can still be a massive restoration project because it’s hard to dry (think soaked hardwood, plaster, insulation, and multiple rooms).
A clear way to remember it:
- Category tells you how careful you must be.
- Class tells you how hard it will be to dry and how big the job is.
How clean water becomes grey or black (and why time matters)
Many homeowners get caught by this: they correctly assume a supply-line leak is clean… but they wait “a couple of days” to deal with it. That’s when clean water stops being clean.
Water can deteriorate in category due to:
- Time and microbial growth (bacteria multiply quickly in warm, damp environments).
- Contact with building materials (dust, insulation, wood, drywall paper, soils, residues).
- Cross-contamination (water flowing through dirty areas, HVAC, crawl spaces, drains).
- Backflow or mixing (a clean leak that reaches a floor drain, sump pit, or sewage-related area).
A practical, real-world answer you can use:
If water has been sitting for more than 24–48 hours, or it wicked into porous materials you can’t fully inspect, you should assume contamination risk increases and cleanup must be more aggressive.
This doesn’t mean everything is automatically “black water,” but it does mean your plan should shift from “dry it out” to “dry it out and control contamination.”
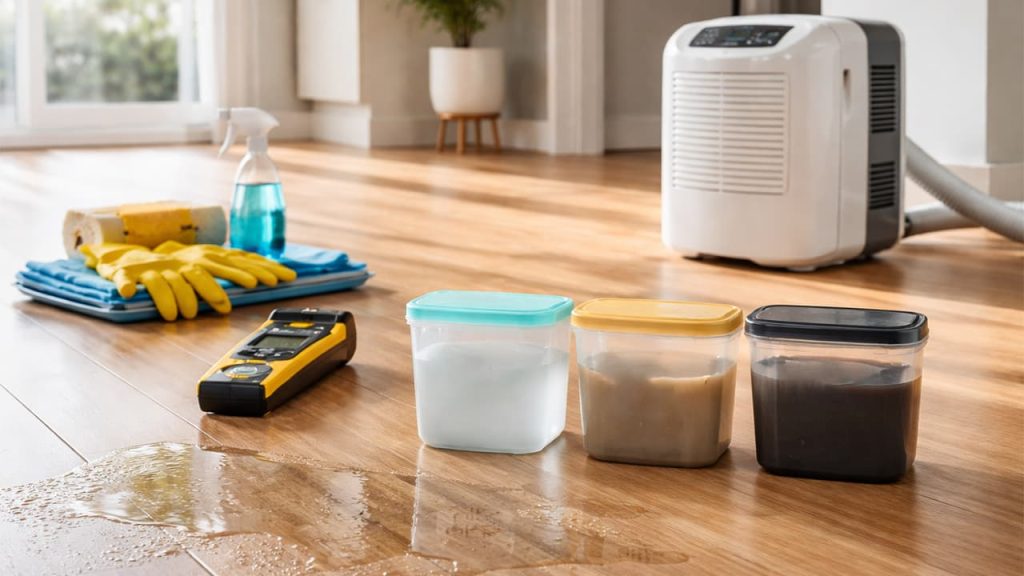
The “first hour” priorities (regardless of category)
Before we get into category-specific cleanup, these are the immediate steps that prevent injuries and secondary damage.
1) Stop the source
- Shut off the water supply if it’s a plumbing leak.
- If it’s a roof leak, place collection containers and reduce water spread; don’t climb onto icy or storm-damaged roofs.
- If it’s a burst pipe, shut off at the main and open faucets to relieve pressure.
2) Manage electrical risk
Water and electricity are a dangerous mix. If water is near outlets, electrical panels, appliances, or you see sagging wet ceilings:
- Turn off power at the breaker to affected areas if you can do it safely.
- If you cannot safely access the panel, call an electrician or emergency services.
3) Limit spread
- Move water-sensitive items (paper, electronics, textiles) to a dry area.
- Use towels to block doorways, or plastic sheeting to protect adjacent rooms.
- Lift furniture legs off wet flooring with foil or plastic blocks to reduce staining and swelling.
4) Document early (helps insurance and decision-making)
Take photos/video of:
- The source area (pipe, appliance, roof point)
- Standing water depth
- Damaged materials
- Any visible contamination (soil, sewage)
5) Decide the category as best you can
You don’t need a lab test to make a safe call. You just need a conservative decision.
Category 1 (Clean Water): what it is, what it isn’t, and how to clean it correctly
What Category 1 means
Category 1 water comes from a sanitary source and is not expected to cause illness from contact at the time it escaped the system.
Common Category 1 sources:
- Broken supply line (hot/cold water)
- Water heater leak (from the clean side)
- Sink or tub overflow (no contaminants, no dirty dishes, no sewage involvement)
- A fresh, clean appliance supply line leak (e.g., ice maker feed line)
What people mistakenly label “clean”
Some sources are frequently misclassified as Category 1:
- Dishwasher discharge (contains food soils and bacteria) → typically Category 2.
- Washing machine discharge (detergents, soils, organic load) → typically Category 2.
- Toilet overflow (even “clear”) → often Category 2, and can become Category 3 depending on circumstances.
- Sump pit water (often contains soil bacteria, debris) → commonly Category 2 or 3 depending on conditions.
The real cleanup goal for Category 1
For Category 1, the goal is:
- Remove water fast
- Dry materials thoroughly
- Prevent hidden moisture
- Avoid turning a clean loss into a mold problem
A straightforward answer that matters in real life:
If you can’t dry wet porous materials (drywall, insulation, carpet pad) quickly and verify dryness, you’re not “cleaning up water”—you’re risking mold and long-term odor.
Category 1 cleanup: step-by-step
If the affected area is small and you caught it early, a careful DIY approach can work. Here’s what “careful” actually means.
Step 1: Extract standing water
- Wet vacuum, pump, or extraction tool.
- The faster you remove bulk water, the easier everything else becomes.
Step 2: Remove or separate what traps moisture
- Lift area rugs.
- If carpet is wet, understand that carpet + pad is the real issue. Pads hold water like a sponge.
- Pull baseboards carefully if water wicked behind them; wicking can keep walls wet for days.
Step 3: Set up drying correctly (not “one fan in the corner”)
Effective drying is about airflow + dehumidification + temperature control:
- Air movers/fans should move air across wet surfaces, not blast randomly.
- A dehumidifier reduces moisture in air so wet materials can actually dry.
- Keep doors open within the affected zone to circulate air, but be cautious if there’s any contamination risk.
Step 4: Check hidden cavities
Water loves to hide:
- Behind baseboards
- Under flooring
- Inside wall cavities (especially if drywall touched water at the bottom)
- Beneath cabinets, vanities, and appliances
If water wicked up drywall more than a small edge area, professionals often remove sections to access and dry cavities properly. Leaving wet insulation behind a “dry-looking” wall is one of the biggest reasons for delayed mold.
Step 5: Verify dryness, don’t guess
A surface can feel dry while the inside is still wet.
- Moisture meters (even consumer-grade) help.
- Look for persistent coolness, odor, swelling, or discoloration.
- If wood floors cup, buckle, or feel spongy, deeper moisture is likely.
What can usually be saved in Category 1 (if acted on quickly)
Often salvageable:
- Solid wood furniture (if dried promptly)
- Hardwood floors (sometimes, depending on duration and installation)
- Drywall (sometimes, if only lightly affected and dried quickly)
- Some carpets (if cleaned and dried rapidly; pad decisions vary)
Often not worth trying to save if saturated:
- Carpet padding
- Cellulose insulation
- Pressboard furniture (swells and fails)
Category 2 (Grey Water): the “looks okay, isn’t okay” category
What Category 2 means
Category 2 water contains significant contamination—biological, chemical, or physical—that can cause illness or discomfort if you contact it or ingest it.
Common Category 2 sources:
- Dishwasher discharge
- Washing machine discharge
- Aquarium leaks
- Sump pit overflow (often Category 2, sometimes worse)
- Toilet overflow without visible solid waste (still contaminated)
- Water that has been sitting and interacting with materials long enough to deteriorate from Category 1
Why Category 2 needs different cleanup
Grey water isn’t necessarily “sewage,” but it’s not “safe water” either. The risk is twofold:
- Health exposure (skin contact, aerosols, contaminated hands touching mouth/eyes)
- Cross-contamination (spreading contaminants to clean areas, especially through shoes, towels, shop vacs, and HVAC airflow)
A clear and practical answer:
With Category 2, the goal isn’t just drying—it’s drying plus decontamination, and in many cases selective removal of porous materials.
Category 2 cleanup: what changes compared to Category 1
You’re adding three layers:
- PPE and hygiene
- Containment mindset
- Cleaning/disinfection steps (and disposal decisions)
PPE that makes sense for Category 2
At minimum:
- Disposable gloves (nitrile)
- Eye protection
- Mask (a well-fitted respirator is better if you’re disturbing dust/insulation)
- Closed shoes you can disinfect
And a habit that matters:
- Wash hands and forearms after work.
- Don’t eat or drink while cleaning.
- Keep kids and pets out of the area.
Materials: what can be saved vs what usually must go
In Category 2, porous materials become a bigger debate.
Often removed (especially if heavily saturated):
- Carpet padding
- Wet drywall at the base (especially if water wicked into insulation)
- Insulation
- Particleboard cabinetry toe-kicks if swollen
- Low-cost porous items that can’t be reliably disinfected
Sometimes salvageable with professional cleaning + drying:
- Carpet (depending on contamination level and time)
- Hardwood (if water didn’t penetrate too deeply and can be dried properly)
- Solid surfaces (tile, sealed stone, metal, plastic) with cleaning and disinfecting
A key real-world point:
If you can’t clean a porous material all the way through, you can’t truly disinfect it.
That’s why pros often remove porous items in grey water losses—because the alternative is odor, bacteria, and future mold.
Cleaning and disinfecting: the correct order
A lot of people spray disinfectant onto dirty surfaces and assume they’re done. But disinfectants work poorly on surfaces covered in grime.
The effective sequence is:
- Clean first (detergent/soap + water, remove visible residue)
- Then disinfect (appropriate product, correct dwell/contact time)
- Then dry completely
If you skip step 1, step 2 is weaker.
Drying still matters (and must be done safely)
You still need airflow and dehumidification, but you must avoid spreading contamination:
- Don’t aim high-powered fans in a way that aerosolizes dirty water residues.
- If there’s any odor or suspected microbial contamination, consider isolating the area and using air filtration.
Category 3 (Black Water): what it includes and why it’s treated as hazardous
What Category 3 means
Category 3 water is grossly contaminated. It may contain sewage, pathogenic microorganisms, and harmful chemicals. Exposure can cause serious illness.
Common Category 3 sources:
- Sewage backups (toilets, main line backups)
- Floodwater from storms, rivers, street runoff, or ocean surge
- Water rising from ground/soil through basements or crawl spaces
- Any water that has contacted sewage or significant contaminants
- Water from Category 2 that has deteriorated significantly with time and exposure
A direct answer you can rely on:
Outdoor floodwater should be treated as black water because it can carry sewage, chemicals, fuel residues, and pathogens—even if it looks “just muddy.”
Why Category 3 requires removal—not just cleaning
Category 3 work is “remove and replace” heavy because:
- Pathogens can be absorbed into porous materials.
- Residues can remain inside fibers and drywall paper.
- Odor and microbial growth persist if contamination remains.
For Category 3, “disinfect and dry” is often not enough unless you also remove the materials that cannot be reliably decontaminated.
What should be removed in Category 3 (typical)
Common removals include:
- Carpet and padding
- Porous rugs
- Upholstered furniture that contacted water (case-by-case, often disposed)
- Drywall and insulation to a safe height (varies by severity)
- Baseboards, trim, and porous finishes that wicked contamination
- Items like cardboard, books, paper goods
Hard surfaces (tile, metal, concrete) can often be cleaned and disinfected, but they must be cleaned properly—multiple passes, correct disinfectants, correct contact times, and thorough drying.
Category 3 safety: what you should not do
- Don’t use a household shop vac on sewage or floodwater unless it’s designed for hazardous liquids and you can disinfect it properly.
- Don’t run your HVAC system if contamination is present; you can distribute pathogens and odor.
- Don’t let children or pets in affected areas.
- Don’t assume that “bleach fixes everything.” Bleach is not a universal solution and can create its own hazards if misused.
If you smell sewage, see visible sewage, or have floodwater from outside, it is generally safer and smarter to involve professionals.
Category decisions in common real-life scenarios (clear, practical calls)
“My toilet overflowed, but it looked clear.”
If a toilet overflow involves only clean supply water (rare), it might be closer to Category 1. But in most real-life events, toilet overflow water is treated as Category 2 because toilets contain bacteria even when they look clean. If there’s any chance of waste involvement—or if water contacted the bowl contents, floor around the toilet, or sat long enough—assume it is Category 2 or 3.
“My basement flooded during heavy rain.”
Treat as Category 3 if water entered from outside, from soil, or through foundation seepage that carries ground contamination. Even if it looks like plain rainwater, once it moves through soil, streets, or drains, contamination risk increases dramatically.
“Dishwasher leaked. It’s just water, right?”
Dishwasher discharge is typically Category 2 because it contains food particles, detergents, and bacteria. Cleanup should include cleaning/disinfection and careful decisions about porous materials.
“My clean supply line leaked, but it sat for two days.”
Initially Category 1, but after 48 hours—especially if it soaked drywall, insulation, or subfloor—you should assume the risk has increased. The bigger issue becomes microbial growth and hidden wet materials. Many professionals will treat the affected porous components with a more conservative approach.
“Sump pump failed and the pit overflowed.”
Often Category 2, sometimes Category 3, depending on what’s in the pit and whether groundwater/sewage cross-connection is possible. If there is odor, visible contamination, or unclear source, treat as higher risk.
Materials and salvage: what the category means for what you keep
Instead of vague “maybe,” here are grounded principles that help you make decisions fast.
Porous materials (hardest to safely decontaminate)
Porous materials absorb water and contaminants inside their structure.
Examples:
- Drywall (especially the paper facing)
- Insulation (fiberglass, cellulose)
- Carpet padding
- Upholstery foam
- Unsealed wood
- Particleboard / MDF
- Cardboard, books, fabrics
Category 1: Some porous materials can be saved if dried quickly and thoroughly.
Category 2: Porous materials are often removed if saturated; limited salvage is possible in some cases with professional cleaning and rapid drying.
Category 3: Porous materials that contacted water are commonly removed and discarded because disinfection cannot reliably reach the interior.
Semi-porous materials (salvage depends on time and saturation)
Examples:
- Hardwood flooring
- Plywood subfloors
- Cabinet boxes (especially if engineered wood)
- Plaster walls (old homes)
- Some grouts and unsealed stone
These materials may be salvageable even in more serious events, but only if:
- Contamination is controlled
- Drying is professional-grade
- You can access trapped moisture
- Odor and microbial risk are addressed
Non-porous materials (most salvageable)
Examples:
- Tile
- Metal
- Glass
- Many plastics
- Sealed concrete (to an extent)
Even with Category 3, these can often be cleaned and disinfected effectively—provided you clean correctly and don’t just “spray and pray.”
The hidden damage most people miss (and why category affects it)
1) Wall cavities and insulation
Water can wick upward in drywall and insulation even if the visible area looks small. Insulation can stay wet for a long time. In Category 2–3, wet insulation isn’t just a drying issue—it’s a contamination reservoir.
2) Subfloor layers and flooring systems
Water travels:
- under floating floors
- between tile and underlayment
- along seams and fasteners
- through nail holes
When contaminated water reaches hidden layers, cleanup often requires removal to prevent long-term odor and microbial growth.
3) Cabinets and toe-kicks
Kitchen and bathroom cabinets can trap water underneath. The toe-kick (the recessed base) often swells and holds moisture. Category 2–3 contamination under cabinets can require removal of toe-kicks or sections to clean and dry properly.
4) HVAC systems
If contaminated water affects HVAC components (floor ducts, returns near floor level, or ductwork in basements), you can spread contamination and odor through the whole home. In those cases, you generally avoid running HVAC until the area is cleaned and verified safe.
What “proper drying” actually involves (in plain English)
Drying isn’t just about evaporating water from surfaces. It’s about removing moisture from materials without creating new problems.
Professional drying often uses:
- Air movers to create controlled airflow across wet surfaces
- Dehumidifiers (refrigerant or desiccant) to remove water from the air
- Moisture meters and sometimes thermal imaging to locate moisture
- Controlled containment and filtration when contamination or microbial risk is present
A direct, useful answer:
If you dry the air but leave moisture trapped inside walls, floors, or insulation, the building stays wet—just quieter. That’s when odor and mold show up weeks later.
Cleaning and disinfection: what works, what’s misunderstood
Cleaning is not the same as disinfecting
- Cleaning removes dirt and organic material.
- Disinfecting kills microbes on a surface.
Disinfectants are less effective on dirty surfaces. That’s why pros clean first.
Disinfectants need contact time
Many products require the surface to remain visibly wet for a specific time to be effective. Quick spray-and-wipe is often not enough.
Bleach isn’t a universal solution
Bleach can be appropriate for some non-porous surfaces, but:
- It can irritate lungs and skin.
- It can damage materials.
- It’s not ideal for many porous surfaces.
- Mixing bleach with other cleaners (especially ammonia) can create toxic gases.
A safer general approach is to use appropriate EPA-registered disinfectants as directed, and focus on the clean → disinfect → dry sequence.
Odor control: why “it still smells” happens
Persistent odor after water damage usually means one of these:
- Contaminated porous material was left in place (pad, drywall paper, insulation).
- Hidden moisture remains (cavity, subfloor, under cabinets).
- Bacteria or mold established in materials during slow drying.
- HVAC spread odor particles and contaminants.
A plain answer that helps decision-making:
If odor remains after drying, it’s rarely fixed by “more air fresheners.” It’s fixed by finding and removing the contaminated or still-wet material.
Mold risk and water categories (how they intersect)
Mold doesn’t care whether water is clean or dirty. Mold cares about moisture + time + food (and drywall paper, wood, and dust are excellent food). Category influences health risk and remediation approach, but drying speed is the universal priority.
A very practical threshold:
If porous materials stayed wet for more than 24–48 hours, assume mold risk is significant and take a more conservative approach—especially behind walls and under floors.
When DIY is reasonable vs when professionals are the safer choice
DIY can be reasonable when:
- It’s clearly Category 1
- The affected area is small and accessible
- You can extract water quickly
- You can dry thoroughly within 24–48 hours
- Water didn’t migrate into wall cavities, under floors, or into insulation
Professional help is strongly recommended when:
- The water is Category 2 or 3
- You have sewage backup or outside flooding
- There’s significant standing water or multiple rooms involved
- Water reached electrical systems or HVAC
- Materials like insulation, plaster walls, hardwood floors, or cabinets are saturated
- You can’t identify the source with confidence
- You notice persistent odor, swelling, staining, or signs of microbial growth
This isn’t about “scaring you into calling someone.” It’s about risk math:
- Category 1 is often a drying problem.
- Category 2 is drying + decontamination + selective removal.
- Category 3 is a health hazard cleanup where removal decisions matter as much as drying.
A simple decision guide you can actually use
Step A: Identify the source
- Supply line leak, clean tub overflow → likely Category 1
- Dishwasher, washing machine, toilet overflow → likely Category 2
- Sewage backup, outside flood, water from soil → Category 3
Step B: Consider contact and migration
- Did it touch trash, soil, crawl space, drains, or sewage-related areas?
- Did it reach porous materials you can’t clean internally (pad, insulation, drywall)?
If yes, move the category risk upward.
Step C: Consider time
- Under 24 hours and clean source → lower risk
- Over 48 hours, hidden moisture likely → higher risk and more removal may be needed
Step D: Decide cleanup standard
- Category 1: extract + dry + monitor
- Category 2: extract + clean + disinfect + dry + selective removal
- Category 3: containment + remove porous materials + thorough cleaning/disinfection + professional drying + verification
Special considerations for older homes and common Boston-area building styles
Many homes in older Northeast housing stock have features that complicate drying and contamination control:
- Plaster walls (can hold moisture differently than drywall)
- Multiple flooring layers (old hardwood over subfloor over older underlayment)
- Finished basements with hidden cavities
- Older drain systems and occasional backflow issues
In these homes, water can travel farther before you see it. If you see staining at a baseboard, the real wet zone may be much larger behind the wall.
A practical answer:
If you have an older home and water reached walls or floors, assume hidden moisture is likely and verify with measurements or professional assessment rather than relying on appearance.
What to keep, what to discard: contents decisions by category
Category 1 contents (usually salvageable if dried quickly)
- Clothing, fabrics (wash promptly)
- Most furniture (if dried and not swollen)
- Many household items (wipe down and dry)
Category 2 contents (case-by-case)
- Washable fabrics can often be cleaned, but handle carefully and wash hot if appropriate
- Upholstered furniture is a risk if saturated
- Items stored on floors (especially cardboard boxes) often absorb contamination
Category 3 contents (be conservative)
- Cardboard, books, paper goods: usually discard
- Plush toys, absorbent fabrics: often discard
- Upholstery and mattresses: often discard if contacted by black water
- Non-porous items: can be cleaned/disinfected, but must be done thoroughly
Common mistakes that make water damage worse
1) Waiting “to see if it dries”
Moisture trapped inside walls and under floors rarely resolves on its own in a safe timeframe. Waiting increases contamination and mold risk.
2) Using fans without dehumidification
Fans move moisture into the air. If humidity stays high, materials won’t dry properly.
3) Leaving carpet padding
Padding is notorious for holding water and odor. Even in Category 1, wet pad is often the hidden problem.
4) Treating grey/black water like clean water
This is how cross-contamination happens: you track it through the home, reuse towels, and spread microbes.
5) Running HVAC too early
If contaminated water is involved, HVAC can distribute odor and particles.
6) Relying on “disinfectant spray” alone
Cleaning first matters. Contact time matters. Porous materials often can’t be disinfected reliably.
What “restoration” typically includes (so you know what you’re paying for)
For larger losses or higher categories, professional restoration is usually a combination of:
- Assessment and moisture mapping (finding where water traveled)
- Extraction (removing bulk water)
- Controlled demolition (removing unsalvageable materials, especially porous items in Category 2–3)
- Cleaning and decontamination (especially critical for Category 2–3)
- Drying and dehumidification (monitored with measurements)
- Air filtration and containment when needed
- Odor control if contamination or smoke-related issues exist
- Rebuild/repairs (drywall, flooring, trim, paint, etc.)
A grounded takeaway:
If a contractor only talks about “spraying antimicrobial and running fans,” ask how they verify moisture levels and how they handle contaminated porous materials—because that’s where failures happen.
Final clarity: what each category really means for cleanup
Category 1 (Clean Water): what it means for cleanup
- Main goal: extract and dry fast
- Cleanup focus: drying, moisture verification
- Materials: many can be saved if dried quickly
- Biggest risk: hidden moisture → mold later
Category 2 (Grey Water): what it means for cleanup
- Main goal: extract + clean + disinfect + dry
- Cleanup focus: decontamination + selective removal
- Materials: porous items may need removal if saturated
- Biggest risk: cross-contamination and lingering bacteria/odor if porous materials remain
Category 3 (Black Water): what it means for cleanup
- Main goal: hazard control + removal + thorough decontamination
- Cleanup focus: containment, disposal of porous materials, deep cleaning/disinfection
- Materials: many porous items are removed; hard surfaces can often be cleaned properly
- Biggest risk: serious illness + persistent contamination if not handled correctly